
It's important to note that Snapchat utilizes two axes of navigation. The first axis (X) is horizontal and relatively simple to incorporate, as discussed in Part 1 of this tutorial. The second axis (Y) is vertical and more challenging to develop, but I found it to be an enjoyable process. In fact, the second part of this tutorial will focus on how to create this vertical axis and serve as the foundation for mastering Snapchat's complete navigation system.
To recap, this is how the navigation should function:
- From the center panel the user should be able to swipe up and down to extra panels
- The top panel seems to appear from underneath scroll view
- The bottom panel overlaps the camera/central layer when appearing but below the navigation buttons
- Bonus problem: the camera layer (central panel) acts as a background for the left and right panel — while scrolling horizontally, they cover the central panel rather than pushing the view away.
So how do we do it? In my opinion adding second scroll view is not an option, due to the custom transitioning of the top and bottom panel. That’s why I think this is a great opportunity to use UIPanGestureRecognizer! By measuring changes in touch position on the main screen, we can calculate the Panel y-axis position and with proper positioning on the z-axis we will resolve issues with custom transitioning.
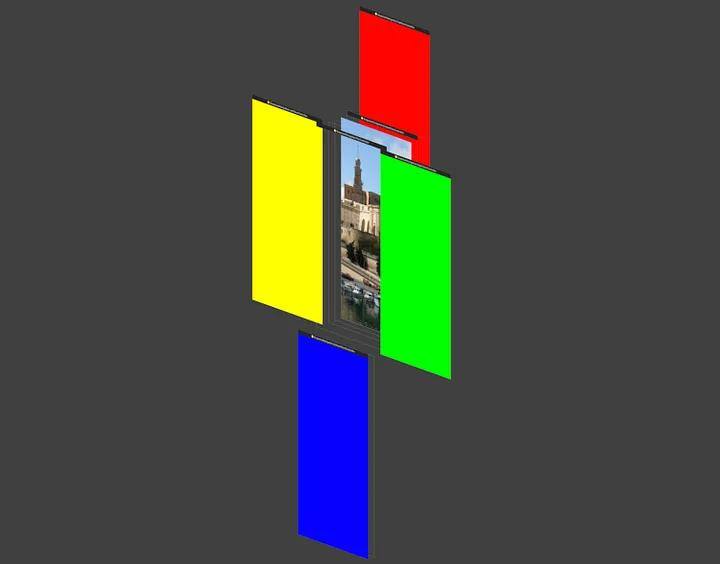
See the image below:
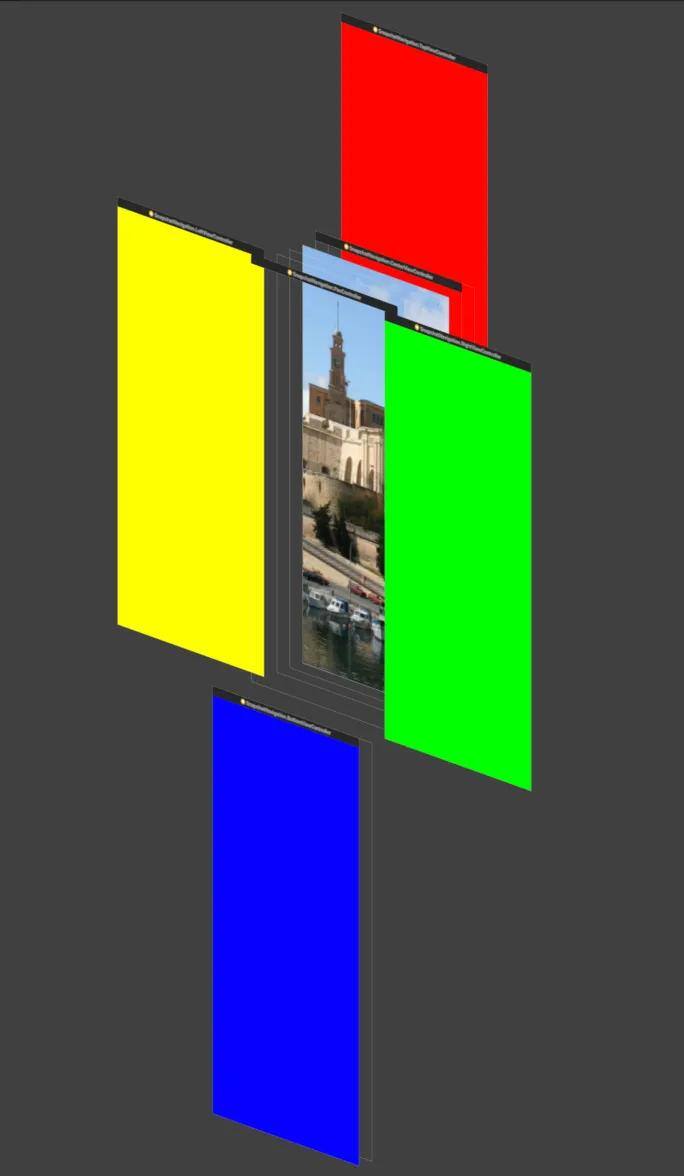
Therefore we can divide our Panel into 4 different layers:
- Red — top panel container
- Blue — bottom panel container
- Picture — center panel container, that’s the place for camera controller
- Yellow, green and transparent panel — scroll view implemented in previous part with one major change. Since we moved central panel under scroll view, the transparent part stays empty. Here we can put UIViewController, which recognizes pan gestures.
Now that we have a plan, let’s dive into the code.
  private var topContainer: UIView!
	private var centralContainer: UIView!
	private var scrollContainer: UIView!
	private var bottomContainer: UIView!
We’ll also need an extension to fit controllers into containers
  extension UIViewController {
        func addChild(_ controller: UIViewController, toContainer container: UIView) {
            guard let subView = controller.view else { return }
            addChild(controller)
            container.addSubview(subView)
            controller.didMove(toParent: self)
            subView.fit(to: container)
        }
    }
Then we setup the UI in viewDidLoad once again with following changes
  private func setupUI() {
        setupHorizontalViews()
        setupTopView()
        setupBottomView()
    }

    private func setupHorizontalViews() {
        centerContainer = UIView()
        view.addSubview(centerContainer)
        centerContainer.fit(to: view)
        centerContainer.clipsToBounds = true
        let centerController = CenterViewController()
        addChild(centerController, toContainer: centerContainer)

        scrollContainer = UIView()
        view.addSubview(scrollContainer)
        scrollContainer.fit(to: view)

        let rightController = RightViewController()
        let panController = PanController()
        let leftController = LeftViewController()

        let horizontalControllers = [ leftController, panController, rightController ]

        scrollView = UIScrollView.makeHorizontal(with: horizontalControllers, in: self)
        scrollContainer.addSubview(scrollView)
        scrollView.fit(to: scrollContainer)
    }

    private func setupTopView() {
        topContainer = UIView()
        view.insertSubview(topContainer, belowSubview: centerContainer)
        topContainer.translatesAutoresizingMaskIntoConstraints = false
        NSLayoutConstraint.activate([ topContainer.heightAnchor.constraint(equalTo: view.heightAnchor), topContainer.widthAnchor.constraint(equalTo: view.widthAnchor), topContainer.centerXAnchor.constraint(equalTo: view.centerXAnchor), topContainer.bottomAnchor.constraint(equalTo: view.centerYAnchor) ])

        let topController = TopViewController()
        addChild(topController, toContainer: topContainer)
    }

    private func setupBottomView() {
        bottomContainer = UIView()
        view.insertSubview(bottomContainer, aboveSubview: scrollView)
        bottomContainer.translatesAutoresizingMaskIntoConstraints = false
        NSLayoutConstraint.activate([ bottomContainer.heightAnchor.constraint(equalTo: view.heightAnchor), bottomContainer.widthAnchor.constraint(equalTo: view.widthAnchor), bottomContainer.centerXAnchor.constraint(equalTo: view.centerXAnchor), bottomContainer.topAnchor.constraint(equalTo: view.bottomAnchor) ])


        let bottomController = BottomViewController()
        addChild(bottomController, toContainer: bottomContainer)
    }
The code is pretty straightforward; just remember to add layers of subviews in proper order.
The fun begins when we start implementing PanController. We have to add a gesture recognizer which measures touch translation in our view on y axis. We should start by adding following lines to viewDidLoad:
  let panGestureRecognizer = UIPanGestureRecognizer(target: self, action: #selector(handlePan(_:)))
        panGestureRecognizer.delegate = self
        view.addGestureRecognizer(panGestureRecognizer)
This delegate of gesture recognizer protects us from measuring translations other than vertical ones.
   func gestureRecognizerShouldBegin(_ gestureRecognizer: UIGestureRecognizer) -> Bool {
        guard let recognizer = gestureRecognizer as? UIPanGestureRecognizer else { return false }
        let translation = recognizer.translation(in: view)
        return abs(translation.x) < abs(translation.y)
    }
Now when we add the recognizer, we should handle it somehow. Our aim is to animate the container positions on main view controller. Access to them can be provided by using a delegate pattern:
  enum Panel {
    case top, bottom, left, center, camera, right
  }

  protocol PanControllerDelegate: class {
    	func present(_ panel: Panel)
    	func view(_ panel: Panel) -> UIView
  }
We will implement delegate methods in main view controller later, for now let’s start work on handling PanGesture.
  private var horizontalDirection: Panel = .center
    private var originalCenter = CGPoint()
    private var topPanelCenter = CGPoint()
    private var bottomPanelCenter = CGPoint()
These variables are important for setting the container center and prediction of user swiping. Transition to top and bottom panel can only take place when the user swipes with correct velocity, or he drags the view to the desired distance from its origin.
  @objc private func handlePan(_ recognizer: UIPanGestureRecognizer) {
        handle(velocity: recognizer.velocity(in: view).y/1000)
        handle(translationOf: recognizer)
    }

    private func handle(velocity: CGFloat) {
        // 1
        switch velocity {
        case _ where velocity > 0.5: horizontalDirection = .top
        case _ where velocity < -0.5: horizontalDirection = .bottom
        default: break
        }
    }

    private func handle(translationOf recognizer: UIPanGestureRecognizer) {
        guard
            let scrollContainer = delegate?.view(.center),
            let mapContainer = delegate?.view(.top),
            let leaderboardsContainer = delegate?.view(.bottom),
            let cameraContainer = delegate?.view(.camera)
            else { return }

        let translation = recognizer.translation(in: view)
        // 2
        let additionalTranslation = (1 - log10(max(1, abs(translation.y)))/10) * translation.y

        switch recognizer.state {
        case .began:
            // 3
            originalCenter = scrollContainer.center
            topPanelCenter = mapContainer.center
            bottomPanelCenter = leaderboardsContainer.center
        case .changed:
            // 4
            scrollContainer.center = CGPoint(x: originalCenter.x, y: originalCenter.y + additionalTranslation)
            cameraContainer.center = CGPoint(x: originalCenter.x, y: originalCenter.y + additionalTranslation)

            if mapContainer.center.y < view.center.y {
                mapContainer.center = CGPoint(x: topPanelCenter.x, y: topPanelCenter.y + translation.y/2)
            }
            leaderboardsContainer.center = CGPoint(x: bottomPanelCenter.x, y: bottomPanelCenter.y + translation.y)
        case .ended:
            // 5
            switch scrollContainer.center {
            case _ where scrollContainer.center.y > view.center.y + view.frame.height/5:
                horizontalDirection = .top
            case _ where scrollContainer.center.y < view.center.y - view.frame.height/5:
                horizontalDirection = .bottom
            default:
                horizontalDirection = .center
            }
            handleEndedState()
        default: break
        }
    }
Now let’s break down what we have done here:
- Calculation of translation and velocity in view. If the velocity reaches the threshold, we set the direction of user gesture
- Here we need to pay some extra attention:
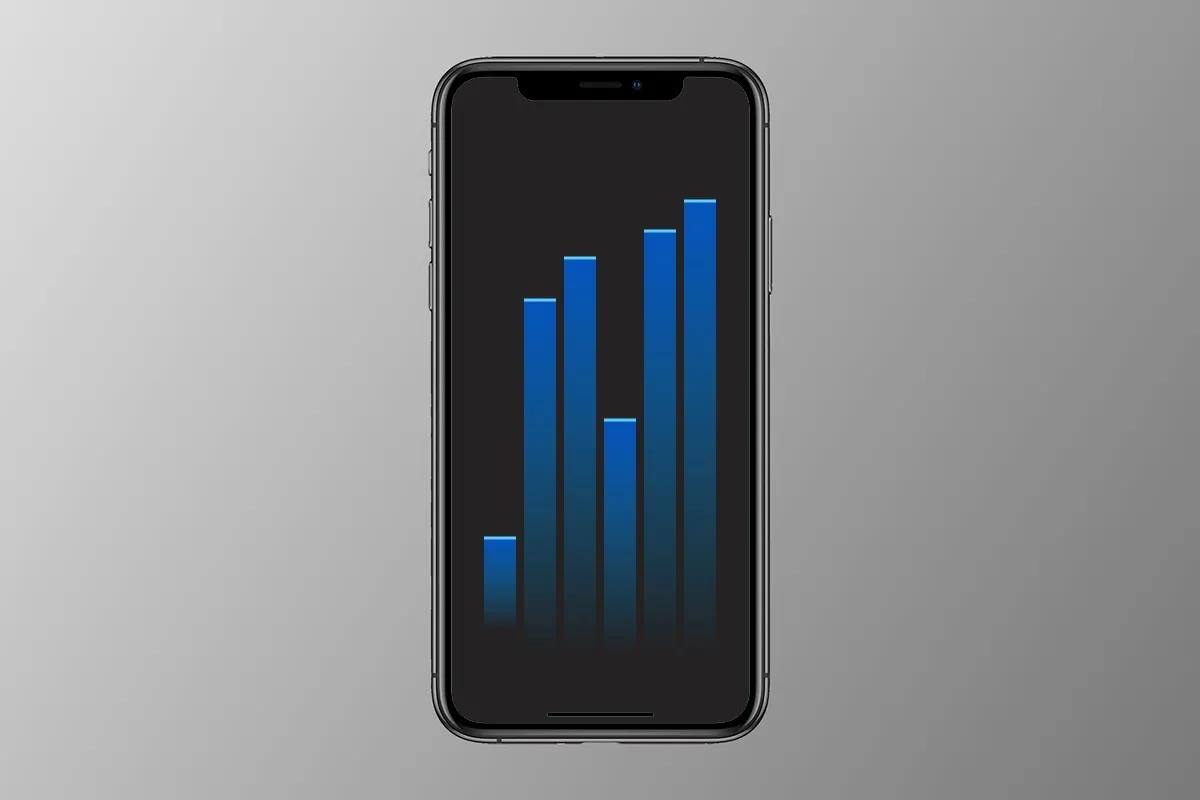
- In Snapchat, while dragging the view vertically, we have some resistance; the bigger the touch translation, the slower the animation moves. Let’s do some math:

- You can see three different plots of y functions. The red one corresponds to y = x, a linear relationship. It means, that with every change in touch translation, we have an equal change in the screen transition. This is exactly that what we wanted to avoid…
- We need a function which grows at the beginning and with a changing `x` so it becomes nearly constant. Just like moving the center panel in the app. It starts smooth, but with dragging we increase its resistance for changing position. The green plot represents y = root(x), which is somehow that what we wanted to achieve. But we can do even better. The blue plot shows what we’re looking for: a plot of the log10(x) function.
- After dividing it by 10 and subtracting from 1 we have a range of values (1 -> 0). This range is nothing more than representation of how big percent of translation we should add to original view center to simulate scroll resistance in our app.
3. Setting the container origins
4. Changing the position of containers by setting a new center with parallax effect.
5. Checking the position of containers, if it’s big enough, or we ended swiping with proper velocity, we’re handling this event with animated transition.
  private func handleEndedState() {
        UIView.animate(withDuration: 0.2) {
            switch self.horizontalDirection {
            case .bottom: self.delegate?.present(.bottom)
            case .top: self.delegate?.present(.top)
            case .center, .camera: self.delegate?.present(.center)
            default: break
            }
        }
    }
Go to the main view controller, now is the time to add panController.delegate = self and implement delegate.
  extension ViewController: PanControllerDelegate {
    func present(_ panel: Panel) {
        switch panel {
        case .bottom:
            bottomContainer.center = view.center
            scrollContainer.center.y = view.center.y - view.frame.height
            centerContainer.center.y = view.center.y - view.frame.height
        case .top:
            topContainer.center = view.center
            scrollContainer.center.y = view.center.y + view.frame.height
            centerContainer.center.y = view.center.y + view.frame.height
        default:
            scrollContainer.center = view.center
            centerContainer.center = scrollContainer.center
            bottomContainer.center.y = view.center.y + view.frame.height
            topContainer.center.y = view.center.y - (view.frame.height/2)
        }
    }

    func view(_ panel: Panel) -> UIView {
        switch panel {
        case .center: return scrollContainer
        case .top: return topContainer
        case .bottom: return bottomContainer
        default: return centerContainer
        }
    }
}
The two axes of navigation are now ready to test.
Like in Snapchat, going back from top and bottom panel by swipe gestures is disabled, so you can add buttons which implement present(_ panel:) delegate to avoid a dead end.
In the original app, you can also navigate by using buttons. We will add them and in third part of this tutorial.
Read the other parts of this tutorial
- Part 1 — Reproducing Snapchat’s horizontal navigation
- Part 3 — Adding the details