
In the previous two parts of this tutorial, we primarily explored gesture-based navigation. Now, it's time to add the finishing touches to our app by incorporating a secondary method of navigation.
Custom Navigation Buttons for iOS
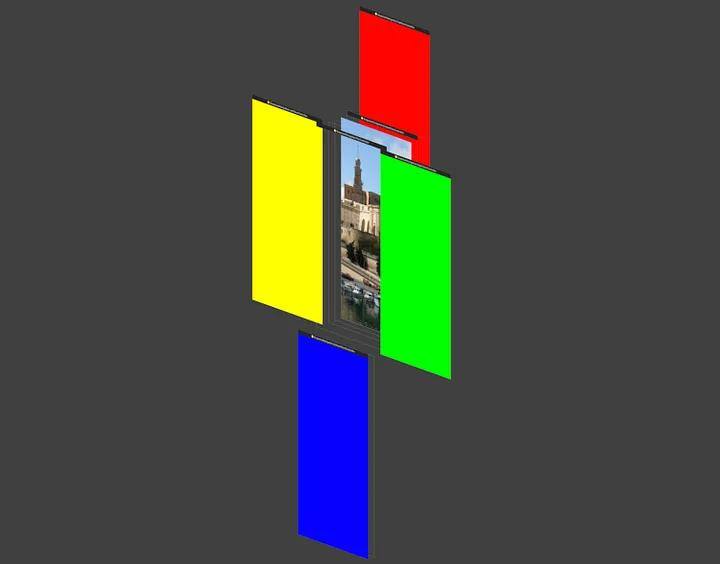
Generally we have three buttons at the bottom. It doesn’t sound unusual, right? We’ve got it in UITabBar, so what’s the big deal? By tapping, we’re redirecting user to the proper controller and… that’s the end of the similarities. The buttons have custom height, they change position while changing scroll offset in both axis, they have animated transparency and what is more important — there aren’t covering part of screen, the app is focused on providing full screen UX without navigation and tab bar.
Let’s start our work by creating some Layout constants and adding a container for the buttons controller.
  enum Layout {
      static let buttonContainerHeight: CGFloat = 80.0
      static let distanceFromBottom: CGFloat = -30.0
      static let leftPanelColor: UIColor = .blue
      static let rightPanelColor: UIColor = .red
  }
  var buttonsContainer: UIView!

    private func setupButtonsContainer() {
        buttonsContainer = UIView()
        view.insertSubview(buttonsContainer, aboveSubview: scrollView)         buttonsContainer.translatesAutoresizingMaskIntoConstraints = false
        let bottomDistance: CGFloat = Layout.distanceFromBottom         NSLayoutConstraint.activate([
            buttonsContainer.widthAnchor.constraint(equalTo: view.widthAnchor),
            buttonsContainer.heightAnchor.constraint(equalToConstant: Layout.buttonContainerHeight),             buttonsContainer.centerXAnchor.constraint(equalTo: view.centerXAnchor),
            buttonsContainer.bottomAnchor.constraint(equalTo: view.bottomAnchor, constant: bottomDistance)             ])

        buttonsController = ButtonsController()         addChild(buttonsController, toContainer: buttonsContainer)     }
Now that we have the container, we can focus on the buttons controller. Buttons should obviously communicate with the main controller. Add buttonsController.delegate = self and implement:
  extension ViewController: ButtonsDelegate {
    func scroll(to panel: Panel) {
        switch panel {
        case .left: scrollView.setContentOffset(.zero, animated: true)
        case .right: scrollView.setContentOffset(CGPoint(x: UIScreen.main.bounds.width * 2, y: 0), animated: true)
        case .center: scrollView.setContentOffset(CGPoint(x: UIScreen.main.bounds.width, y: 0), animated: true)
        default: break
        }
    }
}
There isn’t much to explain here; by tapping the button we’ll change scrollView content offset with animation.
Now add new constants values to Layout enum:
   static let centralButtonHeight: CGFloat = 60.0
    static let sideButtonHeight: CGFloat = 42.0
    static let sideButtonMargin: CGFloat = 32.0
    static let distanceFromYCenter: CGFloat = 10
And add buttons factory method:
   extension UIButton {
        static func make(_ side: Panel) -> UIButton {
            let button = UIButton()
            button.layer.borderWidth = 1
            button.layer.borderColor = UIColor.black.cgColor
            button.layer.cornerRadius = Layout.sideButtonHeight/2
            button.backgroundColor = .white
            var buttonHeight: CGFloat!
            switch side {
            case .left, .right:
                button.layer.cornerRadius = Layout.sideButtonHeight/2
                buttonHeight = Layout.sideButtonHeight
            case .center:
                button.layer.cornerRadius = Layout.centralButtonHeight/2
                buttonHeight = Layout.centralButtonHeight
            default: break
            }

            button.translatesAutoresizingMaskIntoConstraints = false
            NSLayoutConstraint.activate([
                button.heightAnchor.constraint(equalToConstant: buttonHeight),
                button.widthAnchor.constraint(equalToConstant: buttonHeight),
                ])
            return button
        }
    }
Finally, we can go to the buttons controller. Add the needed variables, then setup UI for the buttons.
  weak var delegate: ButtonsFlowDelegate?

    private var leftButton = UIButton.make(.left)
    private var centerButton = UIButton.make(.center)
    private var rightButton = UIButton.make(.right)

    private func setupUI() {
        leftButton.tag = 0
        leftButton.addTarget(self, action: #selector(changePanel(_:)), for: .touchUpInside)
        view.addSubview(leftButton)
        NSLayoutConstraint.activate([
            leftButton.centerYAnchor.constraint(equalTo: view.centerYAnchor, constant: Layout.distanceFromYCenter),
            leftButton.centerXAnchor.constraint(equalTo: view.centerXAnchor, constant: -UIScreen.main.bounds.width / 2 + Layout.sideButtonMargin)
            ])

        centerButton.tag = 1
        centerButton.addTarget(self, action: #selector(changePanel(_:)), for: .touchUpInside)
        view.addSubview(centerButton)
        NSLayoutConstraint.activate([
            centerButton.centerYAnchor.constraint(equalTo: view.centerYAnchor, constant: -Layout.distanceFromYCenter),
            centerButton.centerXAnchor.constraint(equalTo: view.centerXAnchor)
            ])

        rightButton.tag = 2
        rightButton.addTarget(self, action: #selector(changePanel(_:)), for: .touchUpInside)
        view.addSubview(rightButton)
        NSLayoutConstraint.activate([
            rightButton.centerYAnchor.constraint(equalTo: view.centerYAnchor, constant: Layout.distanceFromYCenter),
            rightButton.centerXAnchor.constraint(equalTo: view.centerXAnchor, constant: UIScreen.main.bounds.width / 2 - Layout.sideButtonMargin)
            ])
    }

    @objc private func changePanel(_ sender: UIButton) {
        switch sender.tag {
        case 0: delegate?.scroll(to: .left)
        case 1: delegate?.scroll(to: .center)
        case 2: delegate?.scroll(to: .right)
        default: break
        }
    }
Now we can take advantage of scroll view, which we decided to choose in first part of this tutorial. In ButtonsController we can add a method which animates button with offset changes.
  func animateButtons(_ offset: CGFloat) {
        let buttonsSpacing: CGFloat = UIScreen.main.bounds.width / 2 - Layout.centralButtonHeight / 2 - Layout.sideButtonMargin * 2 - Layout.sideButtonHeight / 2

        leftButton.center.x = (Layout.sideButtonMargin + Layout.sideButtonHeight) / 2 + buttonsSpacing * abs(offset)
        rightButton.center.x = UIScreen.main.bounds.width - (Layout.sideButtonMargin + Layout.sideButtonHeight) / 2 - buttonsSpacing * abs(offset)
        centerButton.center.y = (view.frame.height / 2 - Layout.distanceFromYCenter) + Layout.distanceFromYCenter * abs(offset)
    }
We simply calculated the space between buttons and once again, we’ll multiply it by a value from the range, now (-1 -> 1). The central button will now change its position on the y-axis, the other two on the x-axis. Our button controller is done, so we can go back to main view controller to calculate offset and animate the buttons. Add scrollView.delegate = self and:
  extension ViewController: UIScrollViewDelegate {
        func scrollViewDidScroll(_ scrollView: UIScrollView) {
            let offset = (scrollView.contentOffset.x / view.frame.width) - 1
            buttonsController.animateButtons(offset)
        }
    }
The app can be now be navigated through the buttons, but changing the view from left to right (or opposite side) causes some unwanted animation — the buttons should stay still. We can eliminate this by adding a new variable:
  var shouldAnimate: Bool = false

    func scroll(to panel: Panel) {
        shouldAnimate = scrollView.contentOffset.x == UIScreen.main.bounds.width || panel == .center
        ...
    }
This means that every time the center view is visible, or we are entering it from the right or left panel, we will see the animation.
  func scrollViewWillBeginDragging(_ scrollView: UIScrollView) {
        shouldAnimate = true
    }

    func scrollViewDidScroll(_ scrollView: UIScrollView) {
        guard  shouldAnimate else { return }
        ...
    }
This should prevent animations enabling every time the user decides to navigate via gestures.
One more thing — while browsing through views in Snapchat, the background color changes from one into another with a smooth transition. We’ve got almost everything we need to implement it.
  extension UIColor {
    // 1
    var components: (r: CGFloat, g: CGFloat, b: CGFloat, a: CGFloat) {
        guard let components = self.cgColor.components else { fatalError("invalid color declaration") }
        if self.cgColor.numberOfComponents == 2 {
            return (r: components[0], g: components[0], b: components[0], a: components[1])
        } else {
            return (r: components[0], g: components[1], b: components[2], a: components[3])
        }
    }

    // 2
    static func transition(from startColor: UIColor, to endColor: UIColor, with offset: CGFloat) -> UIColor {
        let red = (1 - offset) * startColor.components.r + offset * endColor.components.r
        let green = (1 - offset) * startColor.components.g + offset * endColor.components.g
        let blue = (1 - offset) * startColor.components.b + offset * endColor.components.b
        let alpha = (1 - offset) * startColor.components.a + offset * endColor.components.a

        return UIColor(red: red, green: green, blue: blue, alpha: alpha)
    }
}
What kind of logic is used here?
- UIColor can be described as a RGBA elements, which we are decomposing into a touple of CGFloat values. Why are we checking the number of components and comparing it to two?
- Colors in apps from version iOS 10 and above are created in two spaces, UIExtendedGrayColorSpace and UIExtendedSRGBColorSpace.
- UIExtendedGrayColorSpace is represented by 2 components, we need them to calculate the transition from UIColor.clear
- UIExtendedSRGBColorSpace is represented by 4 components. We are using it for every other color
2. This method calculates each color’s basic components combining start and end color values multiplied by offset values.
We can use it in scrollViewDidScroll(_:) delegate.
  func scrollViewDidScroll(_ scrollView: UIScrollView) {
        if shouldAnimate { // 1 let endColor: UIColor = scrollView.contentOffset.x < view.bounds.width ? .red : .blue
            let offset = (scrollView.contentOffset.x / view.frame.width) - 1
            scrollContainer.backgroundColor = UIColor.transition(from: .clear, to: endColor, with: abs(offset))
            buttonsController.animateButtons(offset)
        } else {
        // 2
            let offset = (scrollView.contentOffset.x / view.frame.width) / 2
            scrollContainer.backgroundColor = UIColor.transition(from: .red, to: .blue, with: abs(offset))
        }
    }
- We are predicting the color by checking the scroll direction. If we want to animate this transition, it means that the center view will be visible. If it will be visible, we need to set as a start color .clear.
- In this case center view should be hidden all the time — we can set two colors without checking direction.
And that’s all you need to build Snapchat’s navigation on your own. After a bit of styling, our app should looks like the animation below:
I hope you enjoyed this tutorial, and if you have any questions, feel free to contact me, or comment!
You can also check out the implementation on GitHub: https://github.com/arturchabera/ios-snapchat-navigation
Read the other parts of this tutorial
- Part 1 — Reproducing Snapchat’s horizontal navigation
- Part 2 — Vertical scrolling