What will you learn in this tutorial?
Basically, you will learn how to implement a product tab in admin product edition page. The tab will be linked to your own model, so the content of such tab will make possible showing/creating/editing data from the custom model.
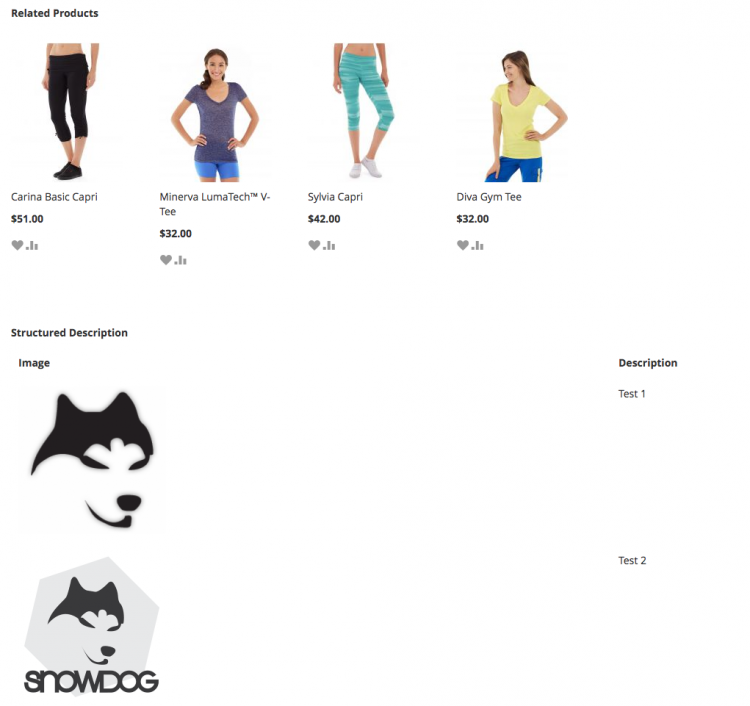
We will build a kind of “Structured Description” tab, where administrator can add/remove/edit rows which contain a short piece of text (textarea input) and an image.
Then we will display it on fronted, in product page under related products block. As a result, we should see the following result in product page:

Let’s see how to do it – step by step.
Create your custom extension
If you have some experience with Magento 2, you probably know how to create your own extension. Otherwise, you can always pull the extension from Snowdog’s repository.
You can also install it by composer simply running the following command in your Magento 2 root folder:
composer require snowdog/module-product-custom-description
Build your setup script
Now it’s time to create a custom table which will store the data manageable under our “Structured Description” product tab.
The table is going to have the following columns: entity_id, product_id, title, description and position
To make it possible we need to create an installer, which basically is Setup/InstallSchema.php and have the table creation code (full code in repo):
  <?php
public function install( SchemaSetupInterface $setup, ModuleContextInterface $context ) {
    $installer = $setup;

    $installer->startSetup();

    $table = $installer->getConnection()
        ->newTable(
            $installer->getTable(
                'snowdog_custom_description'
            )
        )
        ->addColumn(
            'entity_id',
            Table::TYPE_SMALLINT,
            null,
            [
                'identity' => true,
                'nullable' => false,
                'primary' => true
            ],
            'Entity Id'
        )
        ->addColumn(
            'product_id',
            Table::TYPE_INTEGER,
            10,
            ['nullable' => false],
            'Product Id'
        )
        ->addColumn(
            'title',
            Table::TYPE_TEXT,
            255,
            ['nullable' => false],
            'Description Title'
        )
        ->addColumn(
            'description',
            Table::TYPE_TEXT,
            '2M',
            ['nullable' => false],
            'Description'
        )->addColumn(
            'image',
            Table::TYPE_TEXT,
            '400',
            ['nullable' => false],
            'Image'
        )
        ->addColumn(
            'position',
            Table::TYPE_SMALLINT,
            null,
            [
                'nullable' => false,
                'default' => '0'
            ],
            'Position'
        )
        ->setComment('Product Custom Description');
Once we have the above done, we can execute in terminal magento setup:upgrade command which will register our extension in Magento and create the previous table in the data base.
Create your own custom model
Here, we will introduce a new Magento 2 functionality called “Service Contracts”. Basically, service contracts are interfaces. However, they are built under some standard to make the code more elegant and logical. You can read more about it on DevDocs provided by Magento.
Now we need to create interfaces Api / CustomDescriptionRepositoryInterface.php and Api / CustomDescriptionInterface.php (full code in repo). They contain some required methods which make the code more stable and reliable. Then, the Model/CustomDescription.php model implements the methods declared in Api/CustomDescriptionInterface.php:
  public function getId();
public function setId($id);
public function getProductId();
public function setProductId($productId);
public function getTitle();
public function setTitle($title);
public function getDescription();
public function setDescription($description);
public function getImage();
public function setImage($image);
public function getPosition();
public function setPosition($position);
and Model / CustomDescriptionRepository.php will implement the methods declared in Api / CustomDescriptionRepositoryInterface.php:
  /** * Retrieve a custom description by id */
public function get($id);

/** * Retrieve list of all custom descriptions */
public function getAll();

/** * Retrieve list of custom descriptions by product id */
public function getCustomDescriptionByProductId($productId);

/** * Save a custom description */
public function save(\Snowdog\CustomDescription\Api\Data\CustomDescriptionInterface $customDescription);
Once we have defined our interfaces, we need to communicate with Magento to send information about classes used to implement these methods. That’s why we create a file under etc/di.xml, where we have the following code:
  <?xml version="1.0"?>
<config xmlns:xsi="http://www.w3.org/2001/XMLSchema-instance" xsi:noNamespaceSchemaLocation="urn:magento:framework:ObjectManager/etc/config.xsd" >
    <preference for="Snowdog\CustomDescription\Api\CustomDescriptionRepositoryInterface" type="Snowdog\CustomDescription\Model\CustomDescriptionRepository" />

    <preference for="Snowdog\CustomDescription\Api\Data\CustomDescriptionInterface" type="Snowdog\CustomDescription\Model\CustomDescription" />
</config>
Now, we need to create a model, resource and collection files (check in the repo) which implement our contracts created previously.
It’s important to know, that in the file Model / Resource / CustomDescription.php there is a function which allows to get all structured descriptions for a product using their ID:
  /** * Get custom description list form a given product id * * @param $productId * * @return \Snowdog\CustomDescription\Model\Resource\CustomDescription\Collection * * @throws \Magento\Framework\Exception\LocalizedException */

public function getCustomDescriptionByProductId($productId) {
   $collection = $this->collectionFactory->create();
   $collection->addFieldToFilter(
      'product_id',
      (int)$productId
   );

   return $collection;
}
Display custom tab in product admin edition page
We display the custom tab under “Advance Settings” tab group. However, we need to create a few files to make it work:
1) view / adminhtml / layout / catalog_product_new.xml:
  <?xml version="1.0"?>
<page xmlns:xsi="http://www.w3.org/2001/XMLSchema-instance" xsi:noNamespaceSchemaLocation="urn:magento:framework:View/Layout/etc/page_configuration.xsd" >
    <body>
        <referenceBlock name="product_tabs">
            <block class="Magento\Backend\Block\Widget\Tab" name="product.custom.description" >
                <arguments>
                    <argument name="label" xsi:type="string" translate="true">
                        Structured Description
                    </argument>
                    <argument name="url" xsi:type="url" path="snowcustomdescription/custom/description" >
                        <param name="_current">1</param>
                    </argument>
                    <argument name="class" xsi:type="string">
                        ajax
                    </argument>
                    <argument name="group_code" xsi:type="string">
                        advanced
                    </argument>
                </arguments>
            </block>
            <action method="addTab">
                <argument name="name" xsi:type="string">
                    product-custom-description
                </argument>
                <argument name="block" xsi:type="string">
                    product.custom.description
                </argument>
            </action>
        </referenceBlock>
    </body>
</page>
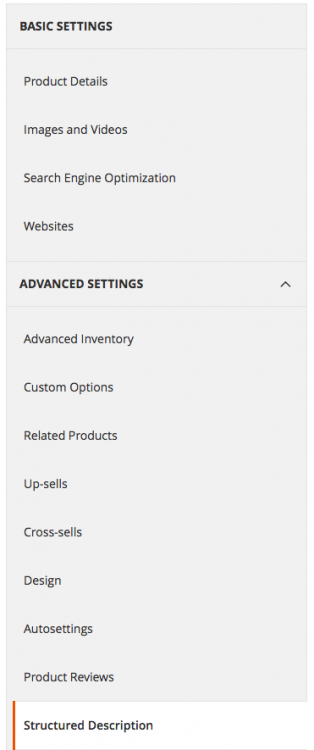
The previous file inserts the tab under “Advanced Settings” group tab in admin product edition (if you don’t see it, try clearing cache):
When you click it, you’ll see an Ajax request. It won’t work, though. First we need to add the controller linked to the tab URL action (defined in the previous file, under page > body > referenceBlock name=”product_tabs” > block name=”product.custom.description” > arguments > argument name=”url” path=”snowcustomdescription/custom/description“) to determine what should be done with the tab.
Create your own controller action
First we need to define the route name for admin actions in the extension, then – create the action which works with our tab. What is to be done:
In etc/adminhtml/routes.xml:
  <?xml version="1.0"?>
<config xmlns:xsi="http://www.w3.org/2001/XMLSchema-instance" xsi:noNamespaceSchemaLocation="urn:magento:framework:App/etc/routes.xsd" >
    <router id="admin">
        <route id="snowcustomdescription" frontName="snowcustomdescription" >
            <module name="Snowdog_CustomDescription" before="Magento_Backend" />
        </route>
    </router>
</config>
Then the action should be executed in the controller Controller / Admin / Custom / Description.php (check repo for details). This performs the request for tab URL (snowcustomdescription/custom/description).
Create your own blocks and templates for the tab action
First, we need to define a xml file which will link the controller action to a block .php file. So we need:
a) view / adminhtml / layout / snowcustomdescription_custom_description.xml
  <?xml version="1.0"?>
<layout xmlns:xsi="http://www.w3.org/2001/XMLSchema-instance" xsi:noNamespaceSchemaLocation="urn:magento:framework:View/Layout/etc/layout_generic.xsd" >
    <container name="root" label="Root" >
        <block class="Snowdog\CustomDescription\Block\Adminhtml\Product\Edit\Tab\CustomDescription" name="admin.product.custom.description" />
    </container>
</layout>
Snowdog \ CustomDescription \Block \ Adminhtml \ Product \ Edit \ Tab \ CustomDescription will link the container of the tab with the block: Block \ Adminhtml \ Product \ Edit \ Tab \ CustomDescription.php (check our repo for details).
And also we need to create the file of the child of the Block \ Adminhtml \ Product \ Edit \ Tab \ CustomDescription.php file, defined in the line:
$this->addChild(‘custom_description_box’, ‘Snowdog\CustomDescription\Block\Adminhtml\Product\Edit\Tab\CustomDescription\Description’);
However, we still need to create the template files that allow to show content when our custom tab is clicked:
b) view / adminhtml / templates / catalog / product / edit / tab / custom_description.phtml
This file is the main container for the structured description rows. Also, we need to create the template linked with the block in point c (defined here: protected$_template = ‘Snowdog_CustomDescription::catalog/product/edit/tab/description.phtml’;).
c) view / adminhtml / templates / catalog / product / edit / tab / description.phtml which adds rows to the previous container.
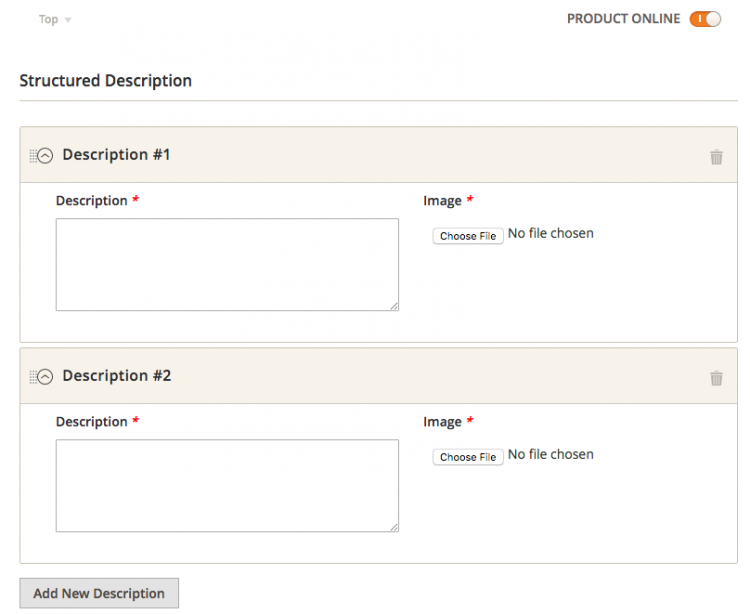
After adding the phtml files, we can now click on our tab (previously, cache should be cleared) and we should see an empty form like this one:
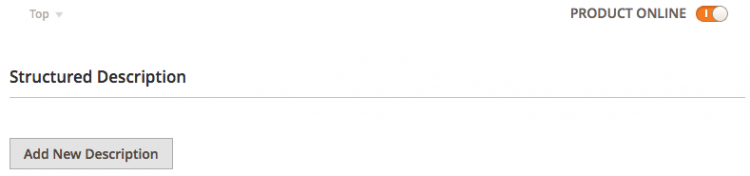
If we click in “Add New Description” button – nothing happens. First, we need to add some Js code to make it work.
Adding Js files to manage structured description form
Basically, the Js file allows us to make similar operations as standard custom options for product form provides. We can add a structured description, remove or just edit an existing one. It also provides us a sorting functionality in drag & drop tool. In Magento 2, if we want to use a Js file, we need to include it in requirejs (read more about it on Magento’s DevDocs). Again – to make all the Js files work, we need to create the following files:
a) File which contains structured description form operations: view / adminhtml / web / js / custom-description.js (check repo for details).
b) Require js file: view / adminhtml / web / require-config.js
  var config = {
  map: {
    '*': {
      customDescription:
        'Snowdog_CustomDescription/js/custom-description'
    }
  }
};
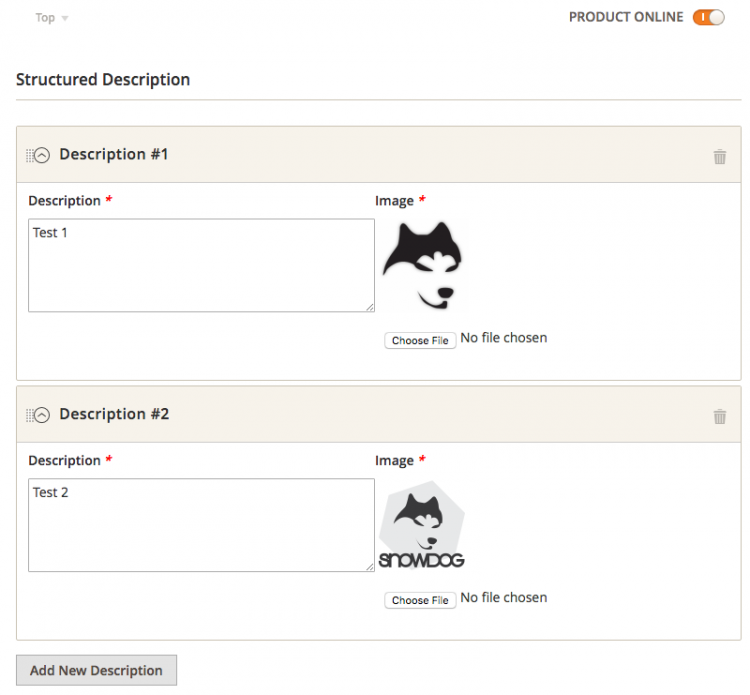
Once we include Js files, and clean cache, we can play with the structured descriptions form: adding and removing rows.
However, there is still no way to save the descriptions. We need to build an observer which will save the data from the form in the tables.
Build your own plug-in to save structured description
We are almost done in the admin part. This point can be done by observers. But, as Magento 2 has new feature that allows to listen any method by dependency injection, we will create such functionality for our extension. Now, we are talking about plugins (more info in official Magento 2 documents). Basically, to build a plugin we need:
a) Configure the plug-in by the file: etc/adminhtml/di.xml (Note: this piece of code was updated at 17/08/2016 due to editor conflicts format):
  <?xml version="1.0"?>
<config>
      <type name="Magento\Catalog\Controller\Adminhtml\Product\Save">
           <plugin name="snowcustomdescription_plugin_product_save_after" type="Snowdog\CustomDescription\Plugin\Adminhtml\ProductSave" sortOrder="1" />
      </type>
</config>
As we can see under type node we write the class which we want to listen (in our case, we want to save structured description once saving the product action in admin is finished). In plugin node we have a name, to add unique plug-in name, and type, which determines what class contains the plugin functionality.
b) And the plugin file itself: Plugin/Adminhtml/ProductSave.php (full code in repo): Here is the function which saves/updates the structured description in our table:
  /** * Save custom description by plugin method * * @param Interceptor $subject * @param RedirectInterceptor $result * * @return RedirectInterceptor */
public function afterExecute(Interceptor $subject, RedirectInterceptor $result) {
    $params = $this->request->getParams();
    $product = $this->registry->registry('current_product');

    if ($product) {
        $productId = $product->getId();
        $customDescData = $params['product']['custom_description'];

        if (is_array($customDescData) && !empty($productId)) {
/* @var $customDescription \Snowdog\CustomDescription\Model\CustomDescription */
            $customDescription = $this->customDescriptionFactory->create();

            foreach ($customDescData as $detDesc) {
                if ($this->validateCustomDescData($detDesc)) {
                    if (isset($detDesc['description_id'])
                        && $detDesc['description_id']
                    ) {
                        $item = $customDescription->load(
                            $detDesc['description_id']
                        );

                        if (isset($detDesc['is_delete'])
                            && $detDesc['is_delete']
                        ) {
                            $item->delete();
                            $item->unsetData();
                            continue;
                        }
                    } else {
                        $item = $customDescription;
                    }

                    $file = $this->uploadImage($detDesc['id'], $productId);

                    if ($file || $item->getId()) {
                        $sortOrder = isset($detDesc['sort_order'])
                            ? $detDesc['sort_order']
                            : 0;
                        $item->setData('description', $detDesc['description']);
                        $item->setData('title', $detDesc['title']);
                        $item->setData('product_id', $productId);
                        $item->setData('position', $sortOrder);

                        if ($file) {
                            $item->setData('image', $file);
                        }

                        try {
                            $item->save();
                            $item->unsetData();
                        } catch (\Exception $e) {
                            $this->_messageManager->addError(__(
                                "Couldn't save changes on custom description"
                            ));
                        }
                    } else {
                        $this->_messageManager->addError(__(
                            "Couldn't save description {$detDesc['description_id']}. Image upload failed."
                        ));
                    }
                }
            }
        }
    }

    return $result;
}
If we look at the file into vendor / magento / module-catalog / Controller / Adminhtml / Product/Save.php there is an execute() method which is the function that triggers saving product action. So, we want to listen such method once it is finished. That’s why the name of our plugin method is called afterExecute(). The prefix after is the one which makes possible to listen a method after its execution is finished. Once the plugin is correctly set, we can save our structured description data.
Show structured description in product page
Once we finish with the admin part, we have to work on the frontend. We include the frontend descriptions in content aside in product page. We need to create a layout, template and block files for it:
a) Layout file: view / frontend / layout / catalog_product_view.xml
  <?xml version="1.0"?>
<page xmlns:xsi="http://www.w3.org/2001/XMLSchema-instance" xsi:noNamespaceSchemaLocation="urn:magento:framework:View/Layout/etc/page_configuration.xsd" >
    <referenceContainer name="content.aside">
        <block class="Snowdog\CustomDescription\Block\Catalog\Product\View\CustomDescription" name="product.custom.description" template="Snowdog_CustomDescription::catalog/product/view/custom-description.phtml" />
    </referenceContainer>
</page>
b) Template file: view / frontend / templates / catalog / product / view / custom-description.phtml
  <?php
/** @var $block \Snowdog\CustomDescription\Block\ * Catalog\Product\View\CustomDescription */
/** @var $customDescription \Snowdog\CustomDescription\ * Model\Resource\CustomDescription\Collection */
$customDescription = $block->getCustomDescription();
?>
<?php if ($customDescription->getSize()) : ?>
    <div class="block block-custom-description"> <div class="block-title title"> <strong id="block-custom-description-heading"> <?php echo __("Structured Description") ?> </strong> </div> <div class="block-content content"> <table> <thead> <tr> <th> <?= __("Image"); ?> </th> <th> <?= __("Description"); ?> </th> </tr> </thead> <tbody> <?php foreach ($customDescription as $d): ?> <tr> <td> <div class="img-item-custom-description"> <img style="width:200px;" src=" <?= $block->getImageSrc( $d->getData('image') ); ?> " title="<?= $d->getData('title'); ?>" alt="<?= $d->getData('title'); ?>" /> </div> </td> <td> <div class="text-item-custom-description"> <?= $d->getData('description'); ?> </div> </td> </tr> <?php endforeach; ?> </tbody> </table> </div> </div> <?php endif;?>
c) Block file: Block / Catalog / Product / View / CustomDescription.php (full code in repo). It extends from Magento\Catalog\Block\Product\View\AbstractView. This allows to get a current product ID. What’s important is that the function makes getting structured description for the current product possible:
  /** * Retrieve custom description for the current product * * @return \Snowdog\CustomDescription\Api\Data \CustomDescriptionInterface[] */
public function getCustomDescription() {
$currentProductId = $this->getProduct()->getId();
$customDescription = $this->customDescriptionRepository
    ->getCustomDescriptionByProductId($currentProductId);

return $customDescription;
}
As you can see we are using our customDescriptionRepository which implements getCustomDescriptionByProductId method from our Api / CustomDescriptionRepositoryInterface.php. That means it is using service contracts successfully.
If everything went as it should, we get the frontent look just like on the screen showed on the beginning of this tutorial.
Short summary
This tutorial was made not only to help in including a tab in product admin page. It might aslo be helpful in other basic Magento 2 issues such as: building models, plugins, controllers, etc.
Thank you for reading.
If anything is not understandable or needs more clarification – let us know in comments and we will try to help.
Update (13-10-2017)
The code has been updated and now it’s compatible with Magento 2.1.x and 2.2.x versions. You can update the extension by composer or download the newer code in the official repository: https://github.com/SnowdogApps/module-product-custom-description