
When I started my programming career I always looked up to the senior developers’ abilities. I was amazed by their skills in never leaving the keyboard while coding. Their swift fingers tapping on the black and white keys created this sense of focus and concentration in the air. The effortless ability to select text, change desktops and tabs, open files and navigate. I was in awe and inspired to learn as much as I could to code with just a keyboard.
37 most important tips to get around Xcode environment
Moving on swiftly, today I would like to dive into Xcode IDE, and share some ways to improve your efficiency and speed up everyday developer activities. Xcode offers a great pool of shortcuts and features, yet some of them might just go over our heads unnoticed, which is unfortunate given how powerful they can be.
Below I’ve chosen the 37 most important tips that will help you get around the Xcode environment with a little more ease and efficiency:
1. If you ever need to ask yourself why some part of your code does not work, you can quickly toggle the debugging window by pressing ⌘ + ⇧ + Y
2. You can open the left navigator panels by pressing ⌘ + [number]. Pressing ⌘ + 0 will hide or reveal the whole navigation panel.
3. As you might expect, the right inspector panel is controlled by pressing ⌥ + ⌘ + [number]. So once again you can close and open it by pressing ⌥ + ⌘ + 0.
4. While refactoring or just writing a lot of code things may become messy (it happens) and whether you use spaces or tabs there is a little trick to keep things clean and tidy. Select the code that may be placed incorrectly and press ⌃ + I to fix it quickly.
5. Documenting code may come in handy at times. To quickly add documentation select part of code and press ⌥ + ⌘ + /.
6. If you want to rename the variable across a whole scope, highlight it and press ⌘ + ⌃ + E. This shortcut is available on the touch bar, and I use it this one quite a lot.
7. You can press ⌥ + Click on a file in the navigator panel to quickly open it in assisting editor.
8. While in Interface Builder, you can constrain to container margins instead of container itself by holding down ⌥ button.
9. You can add multiple Auto Layout constraints in Interface Builder by holding down ⇧ key as you’re clicking.
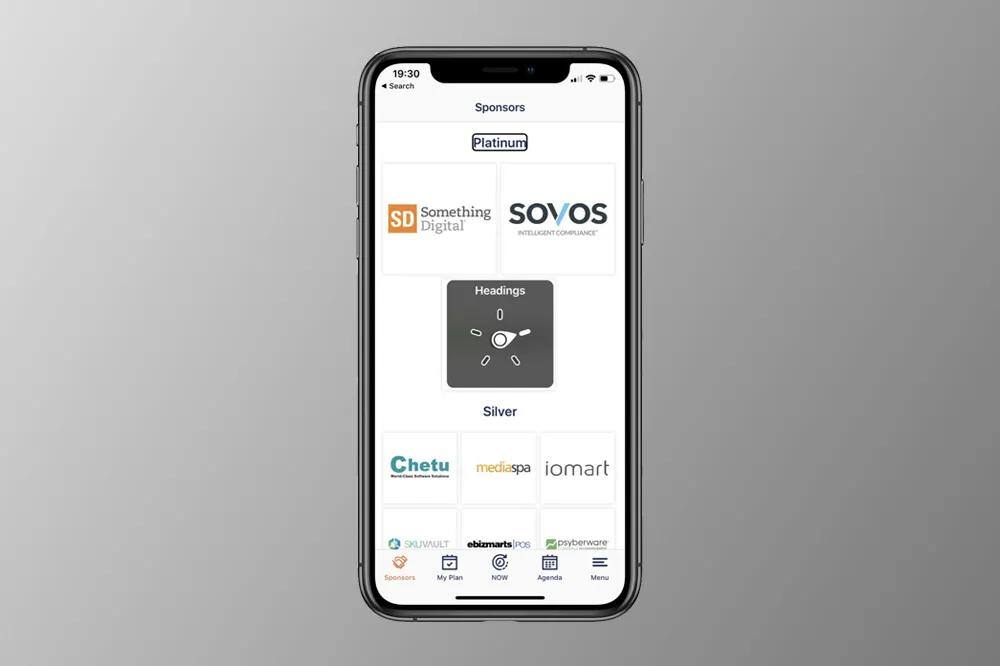
10. When dealing with layout elements that can change their text content change your IB window from Automatic to Preview and then change the language to double-length pseudo-language. Remember that you have to have your IB file localized in order to access this feature.
11. Select a view and hold down ⌥ key, then hover over other views to see their distance to another view.
12. When you see views overlapping in IB, you can use ⌃ + ⇧ + Click on selected area to show a dialog with list of the views which are on the stack.
13. Holding down the ⌥ key while dragging view from object library keeps the dialog box open.
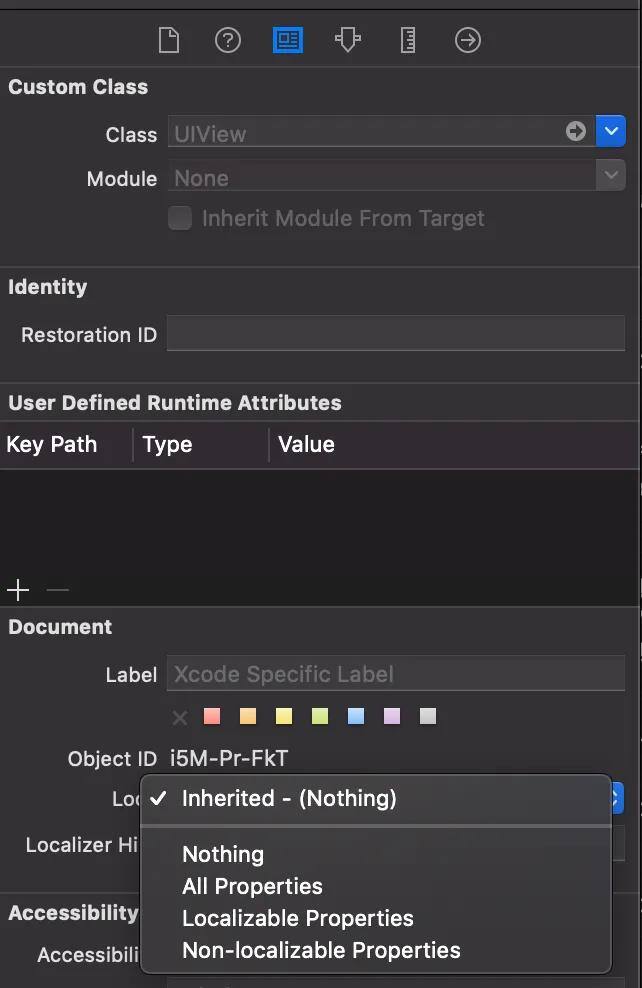
14. You can lock modifications to specific IB file by locking “All Properties” in inspector panel.
15. You can tag variables by @IBInspectable in order to access them through IB editor. @IBDesignable allows seeing how your custom views will appear without building and running your app after each change directly in IB editor.
16. Use #warning(“This is a warning”) to highlight thing you wouldn’t want to forget about. Use #error(“message”) to generate error that will NOT let you build the project

17. If you want to quickly open up object library press ⌘ + ⇧ + L, likewise you can open up media library by pressing ⌘ + ⇧ + M, from where you can drag images directly into IB views.
18. When the app is paused, you can track changes to specific variables. In order to do that, right tap on that variable and select “Watch”. Breakpoint will trigger and app will stop right after the variable has changed.
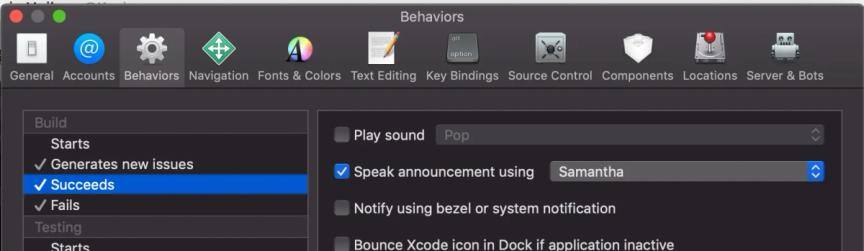
19. Xcode lets you create custom sound alerts and announcements for many actions. This can be helpful if you want to hear when your project finished compiling or if there was an error. You can find it in preferences (⌘ + ,) at “Behaviors” tab.
20. This one is super important! You can switch your current desktop by pressing ⌃ + left / right arrow. Especially useful when dragging object into and out of full screen view.
21. At the bottom of project navigation panel you will find the filter search field. You will find two buttons: a clock and a square (source control). Tapping on the clock will present you with files you’ve opened up recently. The source control icon shows files that you’ve modified and not yet committed.

22. You can access the filtering panel presented above by tapping ⌥ + ⌘ + J
23. These are the moves that the keyboard maestros I mentioned were using. These are not Xcode specific, but totally worth using. ⌃ + left/right arrow lets you move the insertion point to the beginning/end of the previous/next word.
24. Additionally you can use ⌘ + left/right arrow to move the insertion point to the beginning/end of the current line.
25. Since we are talking about the lines. You can press ⌘ + L to quickly go to specified line number. It can be helpful, when you know what line you’re looking for like after a code review.
26. Open Quickly shortcut ⇧ + ⌘ + O give you ability to jump to any file, type, or method in your project. Using a colon : lets you specify the particular line.
27. If you opened up a file by using the shortcut above, you won’t have it selected in project navigator. To make it the active file press ⇧ + ⌘ + J.
28. Holding down the ⌥ key and dragging over with mouse allows you to create multiple cursors and edit code on multiple lines at the same time.
Multiple cursor editing example
29. You can open up a new tab by pressing ⌘ + T. It can be useful when you are working between few classes and want to easily go between them. I like to open tabs with interface builder on the left and assistant editor with class on the right to keep things organized.
30. If you like working with tabs, then you might like this shortcut. You can navigate left and right between them by tapping ⌘ + ⇧ + [ or ]
31. You are probably aware of ⌘ + F.But did you know that adding ⌥ to this shortcut will result in project search, that will list instances of that search in whole project.
32. You can create a custom color in assets catalogue and then use it easily in code or IB color selection dropdown. Just right click the folder and choose “New Color Set”, then adjust the sliders. You can call the color in code by UIColor(named: “Color”).
33. When uploading assets, try to use vector graphics like .pdf files, as they are lightweight and preserve vector data, so your images can be displayed at any size.
34. Xcode lets you create a placeholder field in any part of the app. Just type <#placeholder#> to create it
35. Snippets are short code cutouts that are accessible from snippets library (which is available alternative for object library). You can put your favourite functions there along with some placeholder values to quickly reuse some of your favourite code snippets used throughout your new projects. For example I have saved coordinator base class among many others.
36. Press ⌃+ 6 to open up jump-bar drop-down with all the variable and method names. You can filter them by typing.
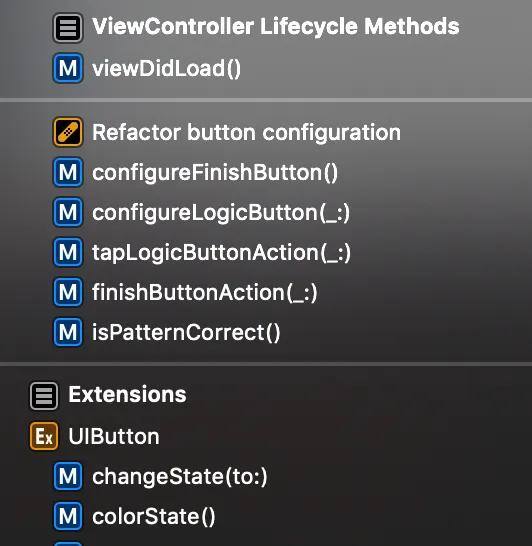
37. If you want to keep things better organized, try using special tags like “MARK, TODO and FIXME”. They let you create special section separators in your code. Mark and todo both share a menu icon, while fixme has distinct bandaid image.
I hope that from reading this list you have picked up a few tricks! Go ahead and clap this article as many times as you want. If I missed something important please do let me know in the comments below.