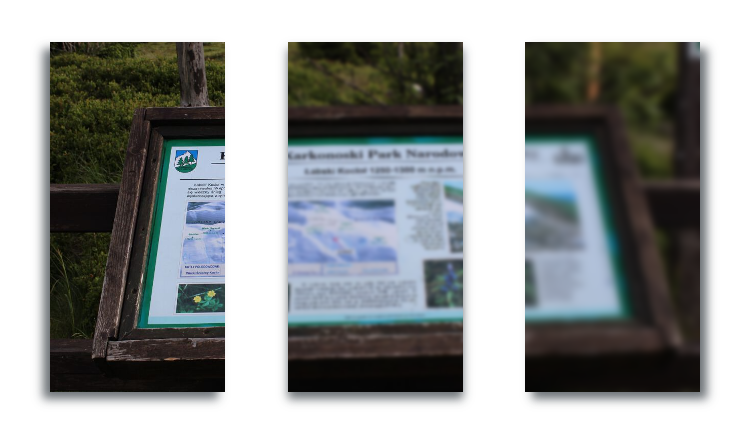
How to develop BlurImageView?
Discovering Material Design gave me a chance to play with animations and image effects. While watching Chiu Ki Chan presentation “Fun with Android Shaders and Filters” I got an idea to create the “focus loss” effect, well known from the DSLR cameras – blurring the image with simultaneous enlarging it. The effect was used instead of default Material Design image tinting pattern. I achieveed it by extendeding ImageView and using RenderScript to blur the original Bitmap.
RenderScript rs = RenderScript.create(getContext());

Allocation allocIn = Allocation.createFromBitmap(rs, original);
Allocation allocOut = Allocation.createFromBitmap(rs, bitmap);

ScriptIntrinsicBlur blur = ScriptIntrinsicBlur.create(
                        rs, Element.U8_4(rs));
blur.setInput(allocIn);
blur.setRadius(radius);
blur.forEach(allocOut);

allocOut.copyTo(bitmap);
rs.destroy();
Of course it’s SDK >= 17 so for older devices you need alternative method. I used “Stack Blur Algorithm” by Mario Klingemann which works fast on my Samsung Galaxy S2.
I wanted to blur image gradually so I correlated radius with percentage of ImageView visibility and every time radius changed new blurred Bitmap was generated inside onDraw method. Unfortunately it was really inefficient and looked like a slideshow, not like smooth animation. Second idea was drawing original Bitmap with changing transparency on most blurred Bitmap. As easy as setting proper alpha in your paint:
originalPaint.setAlpha(128); //value from 0 (max. blurred) to 255 (sharpest)

canvas.drawBitmap(blurBitmap, resizeMatrix, blurPaint);
canvas.drawBitmap(originalBitmap, resizeMatrix, originalPaint);
New solution turned out to be quite fast and efficient, you can check how it works below. Whole BlurImageView class code is available on gist https://gist.github.com/bartektrail/3067b3f29ab4c958a985
How to use it?
Add BlurImageView to your layout.
<pl.snowdog.material.view.BlurImageView android:id="@+id/blur_iv" android:src="@drawable/mountain_view" android:layout_width="match_parent" android:layout_height="match_parent" android:scaleType="centerCrop"/>Set in code focus value. It’s between 0 and 1.0f where 0 is sharp and 1.0 is fully blurred image.
public class TestBlurActivity extends Activity {
    @InjectView(R.id.blur_iv)
    BlurImageView mBlurImageView;

    @Override
    protected void onCreate(Bundle savedInstanceState) {
        super.onCreate(savedInstanceState);
        setContentView(R.layout.activity_test_blur);
        ButterKnife.inject(this);

        mBlurImageView.setFocus(1.0f); // max. blur
    }
}
You can add setFocus method to onScrollChanged or other user interaction but it’s more complex. To keep this post simple, I created sample code snippet code for you, that shows sharp->blurred->sharp animation:
public class TestBlurActivity extends Activity {
    @InjectView(R.id.blur_iv)
    BlurImageView mBlurImageView;

    float focus = 0;
    boolean asc = true;

    Handler animationHandler = new Handler();
    Runnable animationRunnable = new Runnable() {
        @Override
        public void run() {
            if (focus > 1)
                asc = false;

            if (focus < 0)
                asc = true;

            if (asc) {
                focus += 0.05f;
            } else {
                focus -= 0.05f;
            }

            mPhotoView.setFocus(focus);

            animationHandler.postDelayed(animationRunnable, 100);
        }
    };

    @Override
    protected void onCreate(Bundle savedInstanceState) {
        super.onCreate(savedInstanceState);
        setContentView(R.layout.activity_test_blur);
        ButterKnife.inject(this);

        animationHandler.postDelayed(animationRunnable, 100); /start animation
    }
}
Next posts
In the next post we will show you how to implement couple of Material Design features in Pre-Lollipop devices. Stay tuned :)


