Nowadays, we find kiosk devices in more places than ever before. We use these at the train station, tourist information centers, shops, museums, hotels, post offices, and more. They usually provide an app giving useful information, the ability for communication, commerce, entertainment marketing or education. These are often equipped with a colorful touchscreen to facilitate user interaction.
Android devices can be turned into kiosks by configuring them as a COSU app (Corporate Owned Single Use application) or a Single-Use device. In this article, I will explain how to enable kiosk mode and build a simple application for this purpose.
COSU / Kiosk mode
To create a secure kiosk mode we have to disable some Android features. It is important to capture the user within one application, without a way to close it or run a different app. To achieve this we need to satisfy these requirements:
- A single application – the user shouldn’t be able to exit our application and access any settings or private data
- Hidden Home and Recent Apps buttons – these buttons are the most common way to navigate in Android
- Disabled status bar – it is possible to navigate to settings or use a notification to change context
- Running with device’s boot – device should be ready to use immediately after powering on
- Turning off incoming calls – interaction with the application shouldn’t be interrupted
- Blocking all paths to settings – there are many ways to access settings and we should consider them all (for example it is possible to go to language settings through the keyboard)
- The device should be always awake – the user will not have to search for the power button,
- The app is in fullscreen mode
Starting from Android 5.0 we have the opportunity to easily create a kiosk application in Android. Let’s see how we can achieve it.
Screen Pinning
Screen Pinning is a feature which allows you to show only one application until unpinning. It can be used when giving your phone to children or other people without risk of leaking personal information. On every smartphone with system version starting from Android 5.0 Lollipop, you can enable this feature manually in Settings → Security → Screen pinning → On. You can also specify if the device should show your lock screen after unpinning.
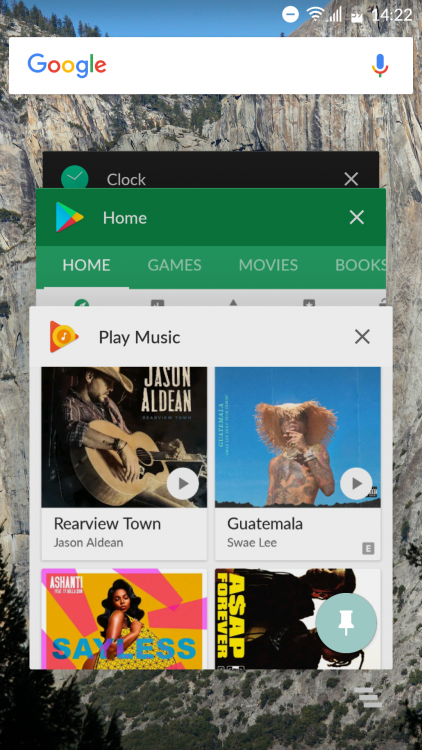
After that, when clicking the Recent Apps button you will see a blue pin icon which allows you to pin the application to your screen. To exit the pinned screen you have to hold recent and home buttons down for a while. With screen pinned enabled, the system behaviour has changed:
- the status bar is blank and status icons are hidden,
- Home and Recent apps buttons are disabled, and
- other apps cannot launch new activities.
In our application, we can also turn this mode on programmatically with startLockTask() in Activity, which will require user confirmation.
The pinned application has a visible but disabled home and recent button and it’s still possible to change context. We will need more privileges to lock the user in our kiosk and pin the screen without confirmation.
Device Admin
It is possible to make our application the administrator of the device, which will enable more possibilities to adjust system settings and manage applications. You can find your current privileged apps in Settings → Security → Device admin apps. After opening the admin details you can see the permissions each app are using. Most permissions are related with wiping device data and blocking the screen if you lose your phone.
If our application is a device admin, it can pin screen without confirmation. Home and Recent apps buttons are also hidden, so exiting from the application is not possible manually and only available from the code.
LockTask mode
Our Kiosk application will mostly be based on a class inheriting from DeviceAdminReceiver and ComponentName. First, we have to tell the system that our app is pretending to become device administrator. We can do it by adding a receiver in AndroidManifest.xml containing metadata with name android.app.device_admin:
Here we can provide the same basic information about our admin like name and description, which will be displayed in device’s settings. Also take note of testOnly=”true”, which will allow us to remove the admin without complications, which will be discussed in next section.
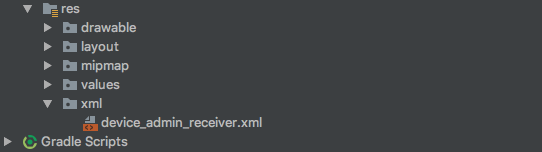
As you can see there is also a path to an xml file containing some information about policies which the admin app will use. To do this we have to create a new directory in res with name xml.
And finally, we can add a class inheriting from DeviceAdminReceiver. This class can also catch intents related to administrator settings and react to them:
From this point, we should install our application, but enabling admin is only possible on devices which don’t have any users added. So before we install app we have to wipe device/factory reset if any Google accounts have been added:
- Wipe/Factory reset device
- Do not add Google account on the first start, just skip it
- Install our application with Android Studio or command line: adb install path/to/kiosk.apk
- Set device admin:
If everything has gone well we should be able to see our application in the list of device’s administrators in Settings → Security → Device admin apps.
We can also check if our application is device admin programmatically:
When our application is device admin we can enable our package to enter lock task. If app wouldn’t be added to this list startLockTask() would only pin screen.
Next, we have to set our application as a Home app. To do this we should add the intent filter in AndroidManifest.xml:
And set our app as the default application:
We should also disable Keyguard so that when the device boots, our application will start immediately without the lock screen appearing.
Additionally we have two possibilities to keep our application awake. First is adding a flag to WindowManager which will keep the screen on with full power:
But if we have admin privileges, we can also set an option Stay awake – Screen will never sleep while charging, which can be found in Developer options in Settings. With this option, the screen will dim after some time but it will never turn off completely:
Finally, we can enable our app to be in fullscreen mode:
You can find a full example on GitHub.
Updating the application
We had specified the android:testOnly="true" attribute in our AndroidManifest.xml so it will be possible to uninstall the app or remove admin with:
But on the production device, this attribute should be deleted so that the app will become a non-test admin. From that point, it will not be possible to remove it or uninstall the application without wipe/Factory reset. It’s also important to remember that if you build an app from the Android Studio, it will be signed with a default key from Android and the application will become a non-test admin. After some time, if you would like to add some new features you will realize that it’s not possible to install a new version. Thankfully, updates can be done when the app is signed with the same key when version code is equal or greater with:
If you would like to get rid of admin and application on the production device you have to reinstall it with a few new changes. Firstly you can wipe data programmatically if you have permission <wipe-data\> in device_admin_receiver.xml with:
If you don’t have this permission new version should do not start LockTask and remove its package from default Home apps list with:
Then you could manually go to Settings to perform wipe/Factory reset.
Summary
Android provides many new features which allow developers to create kiosks. Once enabled, users will not be able to exit the prepared application nor access device settings. One important thing to note is that the device should be packed in a case, to hide the power button, which cannot be disabled.